
TESSELLATIONS
•Step 1 Create a 2.5 X 3 inch grid on your paper. (practice sheet already created for you to use)
•Step 2 Cut an index card in half, creating a 2.5" x 3" rectangle. Find the area of the rectangle (length x width), write it on the back.
•Step 3 Draw a line between two adjacent corners on one of the long sides of the rectangle. Your line can be squiggly or made up of straight segments. Whatever its shape, your line must connect two corners that share one side of the rectangle.
•Step 4 Cut along the line you drew. Take the piece you cut off, flip it over and then slide it across to the opposite long side of the rectangle. Line up the straight edge of the piece with the straight edge of the opposite edge of the rectangle. Tape the piece in place.
•Step 5 Now draw another line that connects two adjacent corners on one of the short sides of the shape.
•Step 6 Cut along this new line. Take the piece you cut off, flip it over and then slide it straight across to the opposite side of the shape. Line up the straight edge of the piece with the straight edge of the shape. Tape the piece in place.
•Step 7 You have now created a shape that you can use as a pattern to make a tessellation. Write the letter A on one side of the shape and turn it over and write the letter B on the other side.
• Step 8 On your grid paper, carefully trace around your pattern shape. It may help to position the squared-off corner (formerly the edge of the index card) in one corner of the grid.
Can you figure out where to place the pattern so that your paper will be covered with repetitions of this shape with no overlaps and no gaps?
Try to cover your whole sheet of paper by tracing the pattern, moving it, then tracing it again. If you start with side A facing up, do you ever have to turn it over to side B to make your tessellation? If you have to flip your piece over, you are making a reflection tessellation. If you also had to move the piece to a new position, you have used translation.
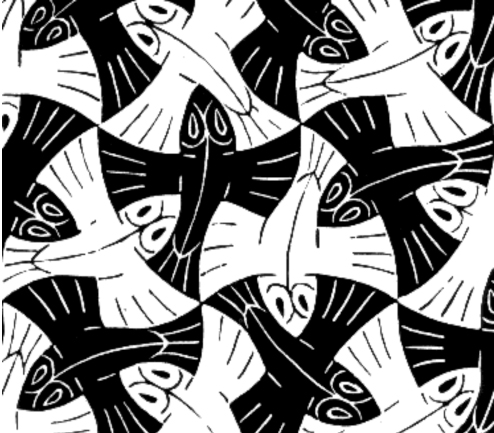
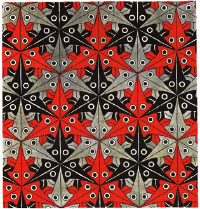
Step 9 Look for a clever way to color in the resulting design on your sheet of paper. Does your shape look like a fish? A bird? An elephant?
When you cut a shape out of paper, then flip it over, the flipped shape looks like a mirror image of the original shape. So a tessellation made with this technique is called a reflection tessellation. Your hands can help you understand the concept of mirror reflection. Your two hands are the same shape—but your right hand is a mirror reflection of your left hand (and vice versa.)
•Step 2 Cut an index card in half, creating a 2.5" x 3" rectangle. Find the area of the rectangle (length x width), write it on the back.
•Step 3 Draw a line between two adjacent corners on one of the long sides of the rectangle. Your line can be squiggly or made up of straight segments. Whatever its shape, your line must connect two corners that share one side of the rectangle.
•Step 4 Cut along the line you drew. Take the piece you cut off, flip it over and then slide it across to the opposite long side of the rectangle. Line up the straight edge of the piece with the straight edge of the opposite edge of the rectangle. Tape the piece in place.
•Step 5 Now draw another line that connects two adjacent corners on one of the short sides of the shape.
•Step 6 Cut along this new line. Take the piece you cut off, flip it over and then slide it straight across to the opposite side of the shape. Line up the straight edge of the piece with the straight edge of the shape. Tape the piece in place.
•Step 7 You have now created a shape that you can use as a pattern to make a tessellation. Write the letter A on one side of the shape and turn it over and write the letter B on the other side.
• Step 8 On your grid paper, carefully trace around your pattern shape. It may help to position the squared-off corner (formerly the edge of the index card) in one corner of the grid.
Can you figure out where to place the pattern so that your paper will be covered with repetitions of this shape with no overlaps and no gaps?
Try to cover your whole sheet of paper by tracing the pattern, moving it, then tracing it again. If you start with side A facing up, do you ever have to turn it over to side B to make your tessellation? If you have to flip your piece over, you are making a reflection tessellation. If you also had to move the piece to a new position, you have used translation.
Step 9 Look for a clever way to color in the resulting design on your sheet of paper. Does your shape look like a fish? A bird? An elephant?
When you cut a shape out of paper, then flip it over, the flipped shape looks like a mirror image of the original shape. So a tessellation made with this technique is called a reflection tessellation. Your hands can help you understand the concept of mirror reflection. Your two hands are the same shape—but your right hand is a mirror reflection of your left hand (and vice versa.)
